Get your SITE_ID and NORG_SITE_KEY
The worker needs two values that tie it to your NORG site. Get them before you start, because the install asks for both.
- SITE_ID: identifies your site in NORG. It is not secret.
- NORG_SITE_KEY: the secret the worker uses to talk to NORG. It is shown once. NORG stores only a hash, so copy it straight away.
Option A: ask your AI assistant (NORG MCP)
With the NORG connector, ask for the edge site's status. It returns the SITE_ID. Then ask it to rotate the site key to mint a fresh NORG_SITE_KEY. Rotating asks you to confirm first: reply yes, and the new key is shown once.
If the site does not exist yet, ask it to convert the workspace to Sitemap Mirror mode for your domain. That creates the site and starts the first crawl. The Deploy button never changes the site's mode, it only deploys the worker. Free workspaces mirror up to 10 pages, and the cap cannot be raised once the site exists, so say so if you want the full mirror.
Option B: have NORG provide them
Ask your NORG contact. We will send the SITE_ID and a freshly minted NORG_SITE_KEY.
Rotating later: rotating invalidates the old key at once. A worker already running starts getting 401 responses from NORG until you put the new key into its secret and redeploy. It never breaks your site in the meantime: the worker falls back to serving your pages unchanged.
Connect the Cloudflare MCP
Add Cloudflare's MCP server to your AI assistant (address https://mcp.cloudflare.com/mcp) and sign in. In Claude Code, type /mcp, choose the Cloudflare server and pick Authenticate.
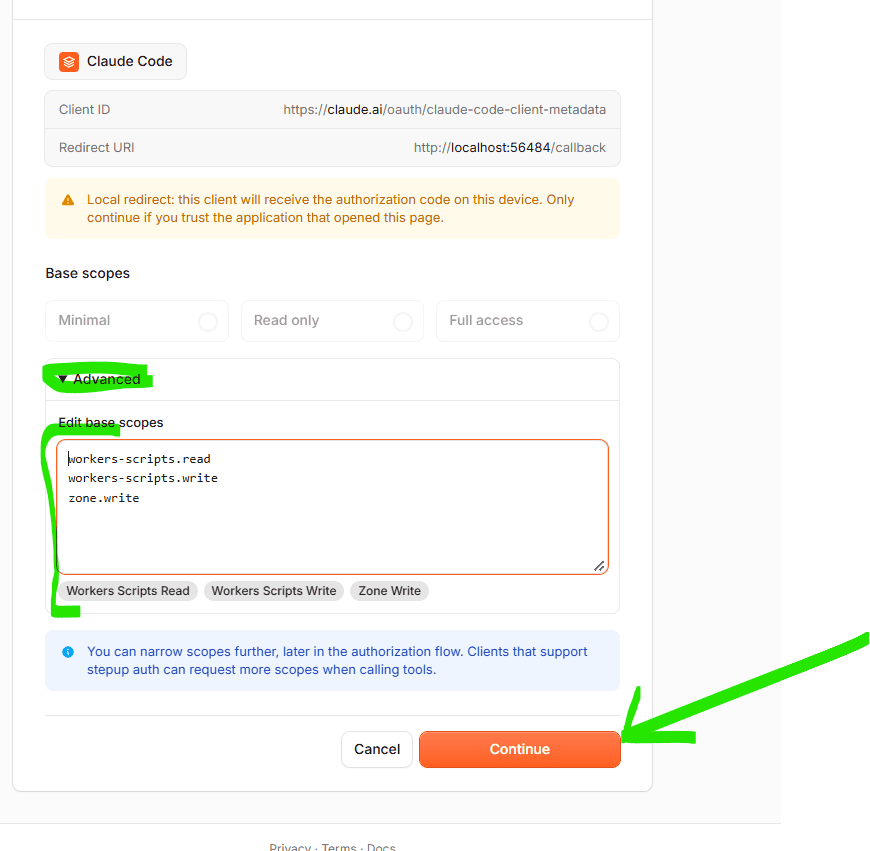
The default Minimal scope cannot see Workers or zones. On the consent page open Advanced, replace the text in Edit base scopes with the five lines below, and click Continue:
workers-scripts.read
workers-scripts.write
workers-routes.read
workers-routes.write
zone.read- Workers Scripts Read and Write: upload the worker, set variables and the schedule.
- Workers Routes Read and Write: attach the worker to your hostname and add the exclusions. Zone Write does not cover this.
- Zone Read: find your zone.
Tick only the account that holds your zone, review the permissions and click Authorize. If your assistant then says it “needs authentication”, sign in once more and do not reconnect or clear anything afterwards. Your assistant must also be able to download a web file as raw text.
Give your assistant this prompt
Cloudflare's MCP runs code in a sandbox that can only reach the Cloudflare API. It cannot download the worker from GitHub. So your assistant fetches the file itself and carries it into the upload, and a checksum inside the sandbox proves it arrived intact. Replace the parts in angle brackets, then send:
Install the NORG edge router on my Cloudflare account with the Cloudflare MCP.

My details
- SITE_ID: <your SITE_ID>
- Worker name: norg-edge-router
- Zone: <example.com>
- Hostname to mirror: <www.example.com>

Follow these rules exactly.

1. GET THE FILE. Download this file with your own tool (for example curl, or a
   fetch tool that returns the raw text):
   https://raw.githubusercontent.com/norgai/norg-edge-mirror-cloudflare-deploy/main/src/edge-router-worker.js
   Do NOT try to fetch it from inside the Cloudflare MCP: its sandbox blocks every
   host except api.cloudflare.com. The text must be exact, never summarised,
   shortened or reformatted. It is about 1,360 lines and 48 KB, starts with
   "// GENERATED by build.mjs" and ends with "};". If you have a shell, run
   sha256sum on it and tell me the value.

2. UPLOAD IT. Use the Cloudflare MCP "execute" tool. The file contains backticks,
   "${" and backslashes, so do not paste it into a template literal as it is.
   Replace each backslash with @@BS@@, each backtick with @@BT@@ and each "${"
   with @@DS@@, put the result in a template literal, and reverse the three
   replacements in code. In the same call compute the SHA-256 of the rebuilt text
   and STOP, uploading nothing, if it differs from the file you downloaded. Tell me
   the SHA-256, the line count and the byte count.

3. WORKER SETTINGS. PUT /accounts/{account_id}/workers/scripts/norg-edge-router as
   multipart form data with two parts:
   - "metadata": JSON with main_module "worker.js", compatibility_date
     "2026-08-01" and bindings [{ "type": "plain_text", "name": "SITE_ID",
     "text": "<my SITE_ID>" }]
   - "worker.js": the file, content type application/javascript+module

4. NO KEY IN CHAT. Do not ask me for NORG_SITE_KEY. I will add it myself in the
   Cloudflare dashboard as a Secret.

5. SCHEDULE. PUT .../schedules with [{ "cron": "*/30 * * * *" }].

6. ROUTES. Look up the zone id (GET /zones?name=<zone>). Create the Worker route
   "<hostname>/*" for norg-edge-router. Then create these exclusion routes with no
   Worker (omit "script"): "<hostname>/_next/*" and "<hostname>/_vercel/*".

7. Touch nothing else: no other Worker, route or DNS record. At the end list
   exactly what you created.
Prefer to hand over the key? Replace rule 4 with: also add { "type": "secret_text", "name": "NORG_SITE_KEY", "text": "<my key>" } to the bindings. The key then passes through the conversation, so treat it as exposed and rotate it when you are done.
Expect it to take a few minutes: the whole file (about 48 KB) goes through the assistant. If you want a lighter route, the Deploy button installs the code with no assistant in the middle.
Check the checksum yourself
Ask the assistant for the SHA-256 it reported. Compare it with the one from your own machine:
curl -s https://raw.githubusercontent.com/norgai/norg-edge-mirror-cloudflare-deploy/main/src/edge-router-worker.js | sha256sumThey must match exactly. If they differ, or the assistant did not report one, tell it to upload again and do not trust the install.
Add NORG_SITE_KEY yourself
In Cloudflare open Workers & Pages, your worker, Settings, then Add variable under Runtime variables and secrets. Name it NORG_SITE_KEY, tick Secret, paste your key and click Add 1 variable and deploy. The screen is the same one shown in the dashboard guide. Skip this step if you put the key in the prompt.
Test that it works
1. The normal site. Open your site in a browser. It must look and behave exactly as before.
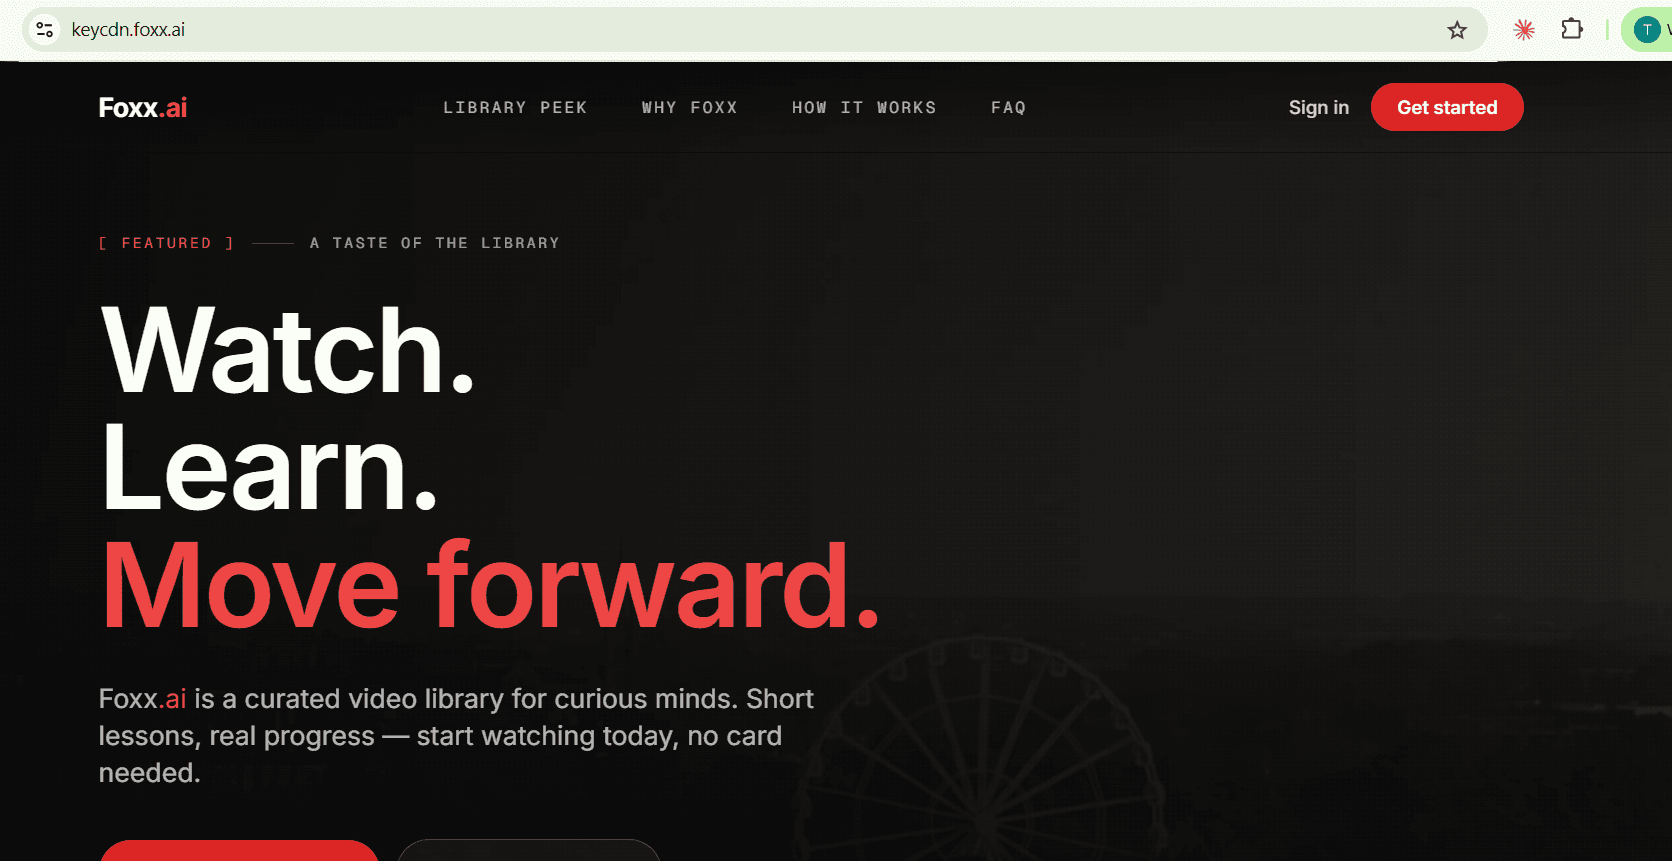
2. The AI mirror. Add ?agent=true to the address, for example https://www.example.com/?agent=true. It should load the NORG AI-optimised version of the page. If it still shows your normal page, the worker is not on the route yet: recheck the route and that the hostname is proxied.
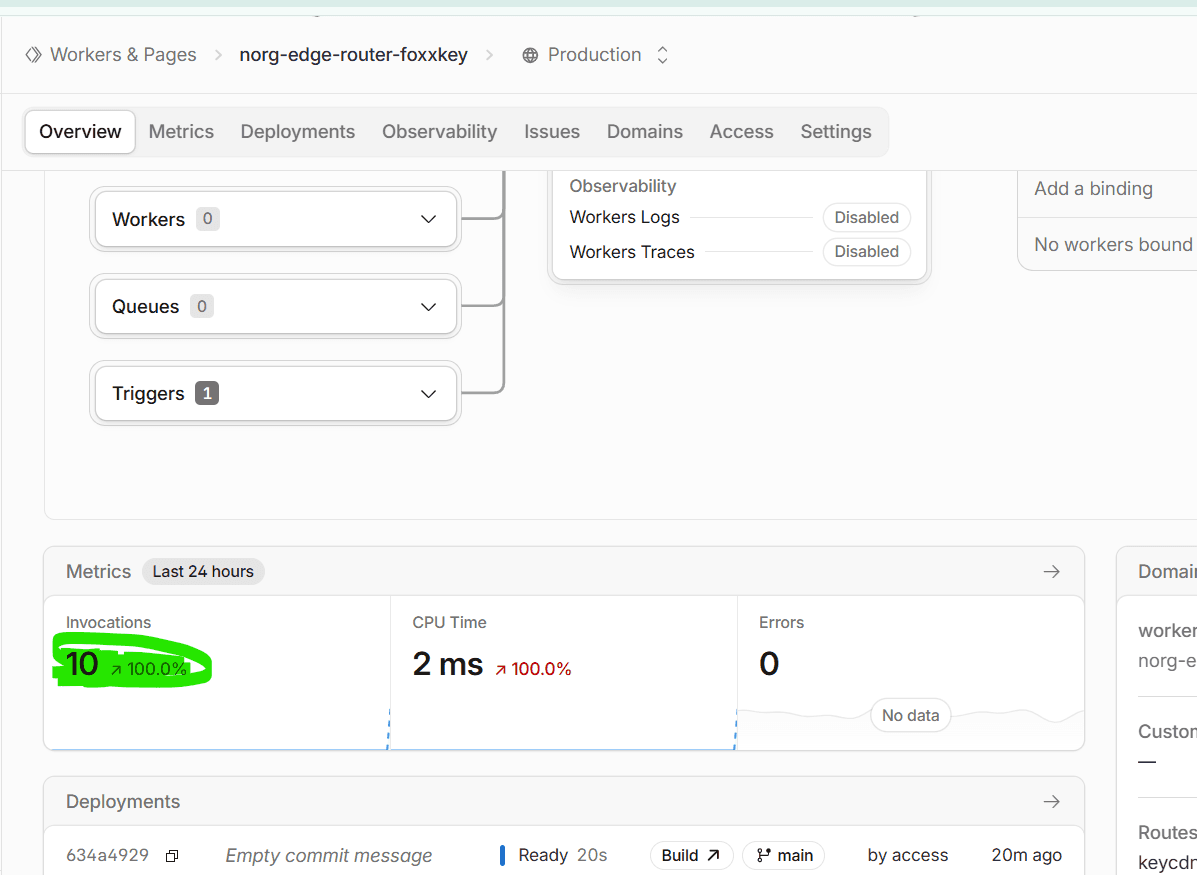
3. Invocations. Back in Cloudflare, open Workers & Pages, then your worker. The Invocations tile should now be above zero and rise as you reload the page. That confirms what you saw in the browser.
Turn on observability
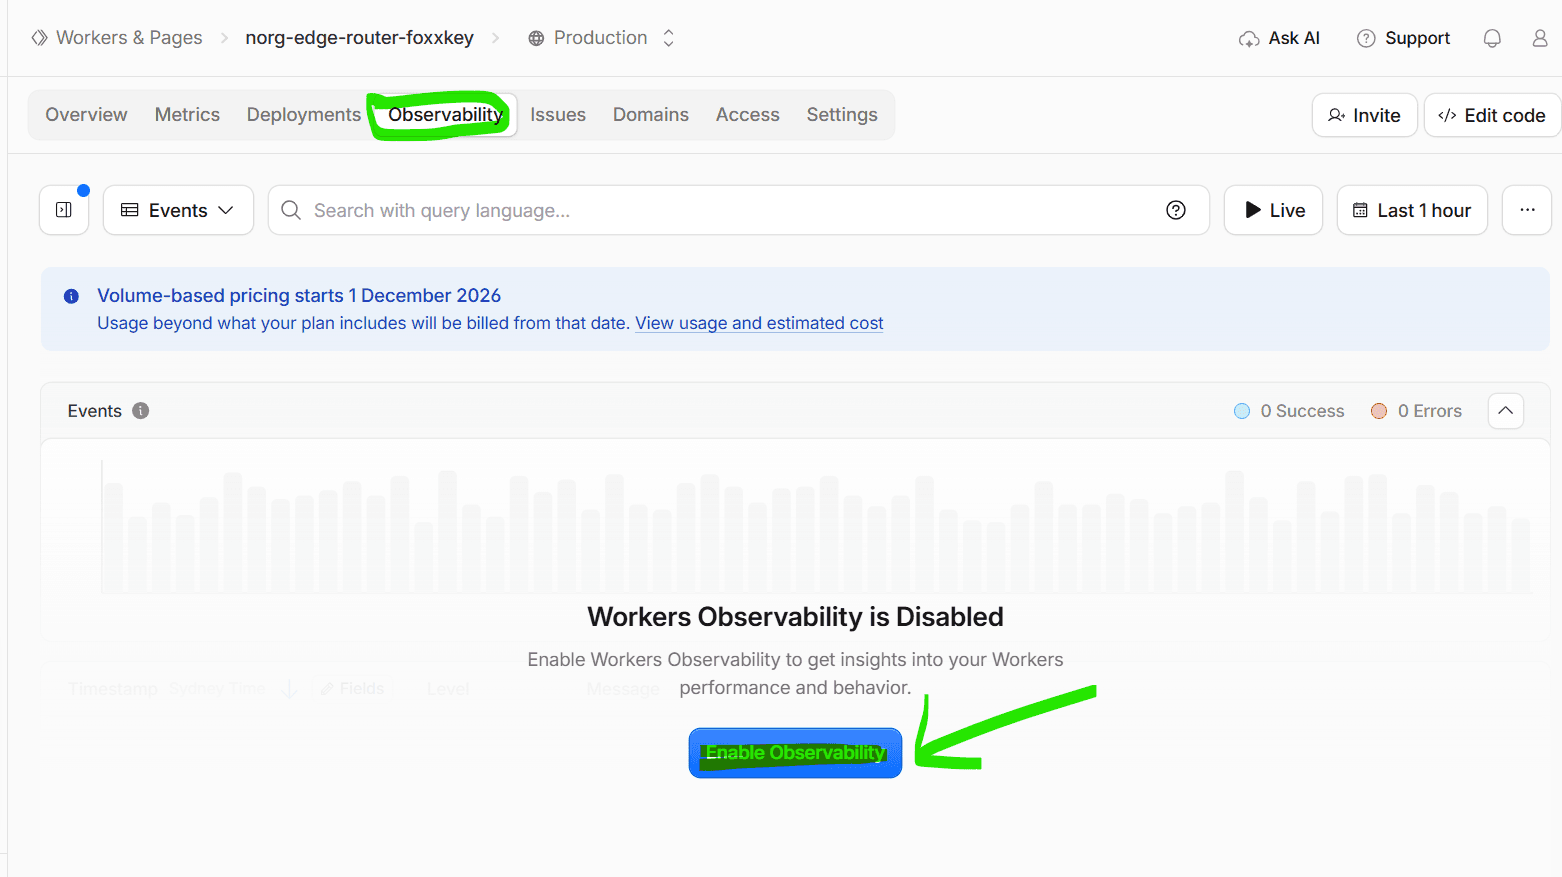
Open the worker's Observability tab and click Enable Observability. Logs then show every request the worker handles, which is the quickest way to see what it is doing.
- Free plan: we recommend enabling it. There is a daily cap on logs, and events past it are dropped rather than billed.
- Paid plan: enable it, but watch the cost. Each request is a log event and logs beyond the plan's allowance are billed, so a busy site adds up. Lower the sampling rate to cap it, and check Cloudflare's current Workers pricing.
- Switch it off once the install has run smoothly for about a month. The worker keeps working without logging.
Revoke the MCP access
The worker keeps running without the connector. When you are finished, remove the assistant's access in Cloudflare under My Profile → Access Management → Connected Applications.